Building a WPA2 Enterprise WLAN with a Ubiquiti UniFi Controller and a Microsoft Network Policy Server
An end-to-end guide to building a Ubiquiti WPA2 Enterprise with Microsoft RADIUS WLANs
- Components
- Building the WLAN environment
- References
This article aims to be the documentation how to build and configure a Ubiquiti WPA2-Enterprise WLAN with Microsoft Network Policy Server (NPS) as the supporting RADIUS server. The WLAN will use EAP-PEAP/MSCHAPv2 to authenticate the users, as it is typically easier and less expensive to deploy than EAP-TLS or EAP-PEAP/TLS.
An important note is that within the Ubiquiti infrastructure stack is that a Ubiquiti Secure Gateway (USG) or third-party gateway is required to configure the VLANs to be assigned to the WLANs. This is because the UniFi Controller server does not have capabilities to define VLANs and subnets.
Components
- Ubiquiti Lite Access Point (AP)
- Windows Server 2022
- Ubuntu 22.04.3 LTS
- (optional) purchased domain
- Managed layer 3 switch OR a managed layer 2 switch & router OR Ubiquiti Secure Gateway (USG)
Building the WLAN environment
This guide assumes that the Windows 2022 and Ubuntu 22.04.3 LTS servers have been pre-built, such as Virtual Machines (VMs). Additionally, that the servers, and the Ubiquiti AP are connected to the same local subnet, and finally there is a DHCP server in place to service the subnet.
Configure Network Infrastructure
For simplicity, this article will use a layer 3 switch (a Cisco Catalyst switch) to define the VLAN and it’s the DHCP service.
- Enable layer 3 functionality
config terminal
ip routing
- Define the DHCP pool, and limit subnet pool range as required
configure terminal
ip dhcp pool infamouseap
network 10.0.10.0 255.255.255.0
default-router 10.0.10.1
dns-server 10.0.10.99
exit
ip dhcp excluded-address 10.0.11.1 10.0.11.199
- Define the VLAN
interface Vlan10
description "InfamousEAP subnet"
ip address 10.0.10.1 255.255.255.0
- Configure the trunk switch port to the UniFi Access Point (AP), defining which VLANs can transit the trunk link.
interface FastEthernet0/6
description "link to UAP-AC-Lite"
switchport trunk encapsulation dot1q
switchport trunk allowed vlan 1,10,11
switchport mode trunk
spanning-tree portfast
Installing the UniFi Network Server application
The UniFi Network Server application will be installed on the Ubuntu 22.04.3 LTS server. UniFi NEtwork Server software is the Wireless LAN Controller (WLC) released by Ubiquiti to managed the Ubiquiti Lite AP.
- Download and launch the promoted unifi network application script by GlennR with the following command:
rm unifi-latest.sh &> /dev/null; \
wget https://get.glennr.nl/unifi/install/install_latest/unifi-latest.sh; \
sudo bash unifi-latest.sh --skip

Initial Windows server configuration
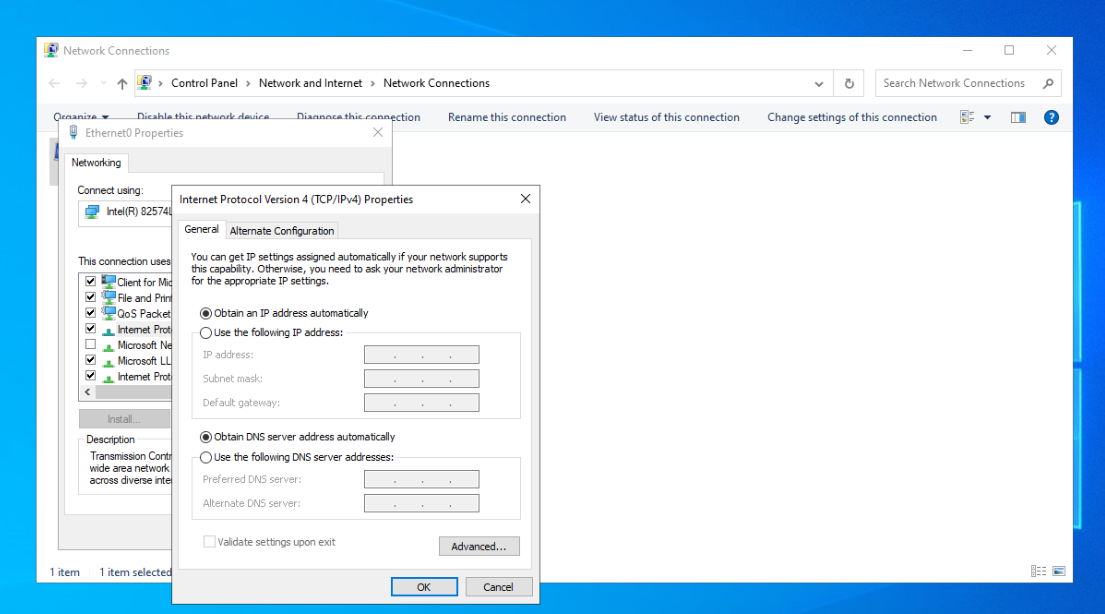
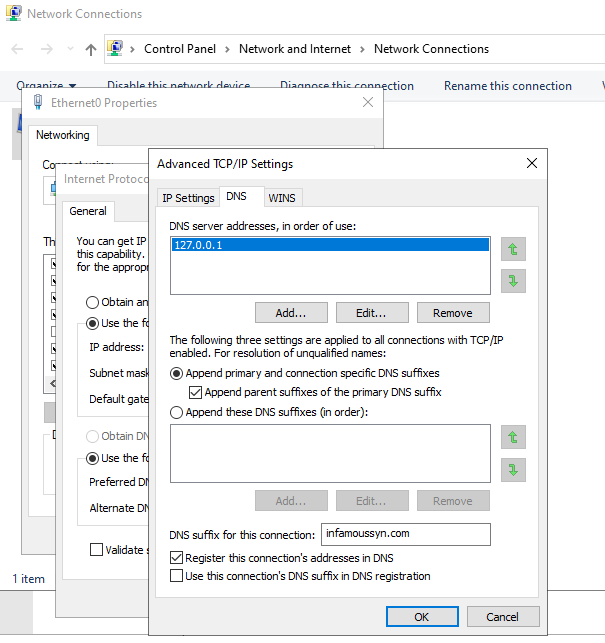
Configure a static IP address
- Set an appropriate static IP address
Win + R > ncpa.cpl > Right Click Adapter > Properties > Internet Protocol Version 4 > Properties
Generate the RADIUS server certificate
Two methods for generating the RADIUS server certificate have been provided below.
(method 1) Generating a self-signed certificate
- Run the following PowerShell command to generated and install the self-signed certificate:
New-SelfSignedCertificate -dnsname ([System.Net.Dns]::GetHostByName($env:computerName).HostName) -KeyLength 2048 -CertStoreLocation cert:\LocalMachine\My -NotAfter (Get-Date).AddYears(20)
This method will often require the Wi-Fi client to disable server validation completely, as by default self-signed certificates are not trusted in certain Operating Systems (OS), such as Windows.
(method 2) Generating a letsencrypt certificate
This method will require the purchased domain listed as optional in the components section above. At a highlevel, the purchased domain will need to be used as the Active Directory Domain Services (AD DS) domain suffix in later steps. Additionally the steps in this method will need to be performed on a system that has a public DNS record for the purchased domain.
Typically, my personal preference is to deploy a droplet using Digital Ocean, then add an A record for the desired hostname that the lab’s RADIUS server will be called. (Example: radius.infamoussyn.com)
- Install the letsencrypt cert-bot with the following command:
sudo python3 -m pip install certbot certbot-apache; \
sudo ln -s /opt/certbot/bin/certbot /usr/bin/certbot
- Generate the certificate with the following command:
echo "1" | certbot certonly -d [domain name]
After this point, any references to a DNS zone file will in relation to the internal zone file that will be configured as part of the Configure DNS Server role step.
Installing the Windows Servers roles
- Open the
Add Roles and Features Wizardfrom the Server Manager, install the following roles:- Active Directory Domain Services
- DNS Server
- Network Policy and Access Services

Configuring the Windows Servers roles
Configure DNS Server role
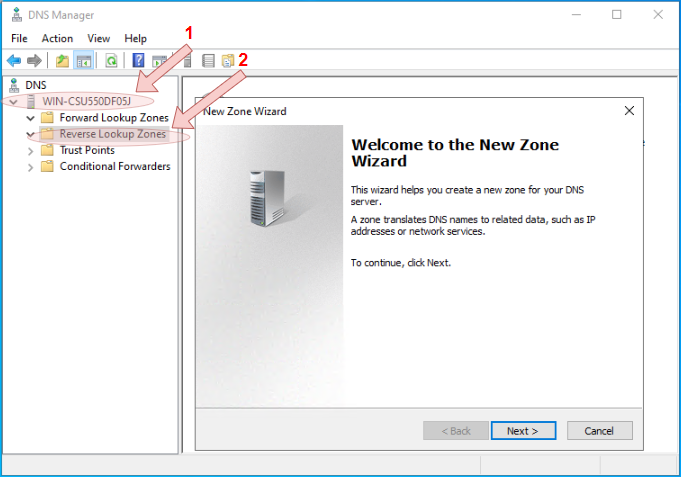
- Open the DNS Manager console
- Expand the tree menu, then right-click on the
Reverse Lookup Zonesnode, and selectNew Zone...from the context menu to launch the wizard.
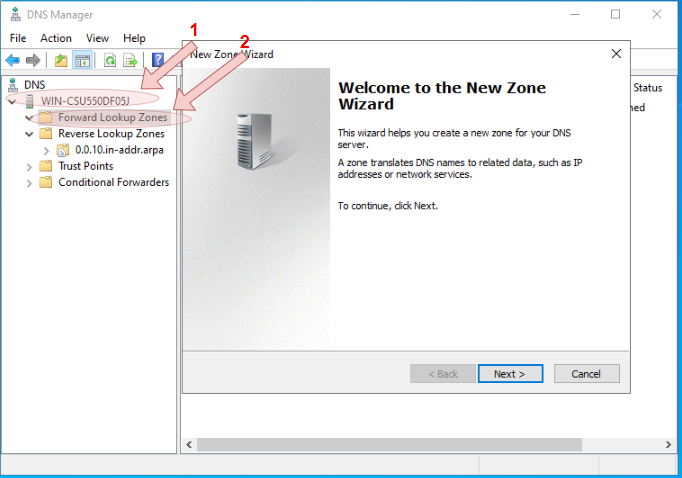
- Expand the tree menu, then right-click on the
Forward Lookup Zonesnode, and selectNew Zone...from the context menu to launch the wizard.
- Exapnd the tree menu, select the newly created forward zone, then right-click within the zone’s view screen and select the
New Host (A or AAAA)option from the context menu. When creating the A record, ensure that theCreate associated pointer (PTR) recordtickbox is also checked for the corrosponding PTR record for the A record is also added the reverse zone file at the same time.
Depending on the intended design needs of the lab, you may want to rename your server to a more relevant name before creating the A record. The name should make the subject of the issued certificate from the Generate the RADIUS server certificate step. I typically skip the renaming step and create a CNAME record, in addition to the server’s A record in the local zone file, that matches the subject name instead.
Configure Active Directory Domain Services
- Progress through the Domain Controller promotion wizard, ensuring that the created domain corrosponds to purchased domain from the (method 2) Generating a letsencrypt certificate step if applicable.
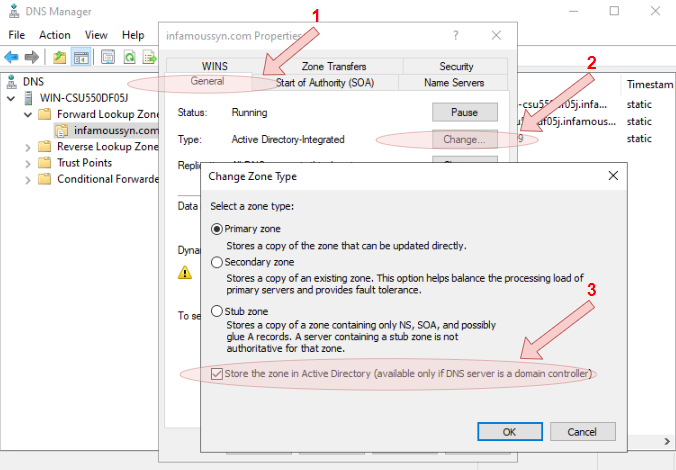
- (optional) Integrate the DNS service with the Active Directory Domain Services by right-clicking inside the right-hand screen of the DNS Manager console, then select
Propertiesfrom the context menu. From the Properties window, click theGeneraltab, and then press theChange...button. Finally, ensure that theStore the zone in Active Directory (available only if DNS server is a domain controller)tick box has been selected.

Configure Network Policy and Access Services
For the purposes of speed and ease, templates will be configured in the Network Policy and Access Services (NPAS) console before configuring the connection profiles.
- Ensure that the certificate generated in the Generate the RADIUS server certificate step has been installed in the server’s local certificate store.
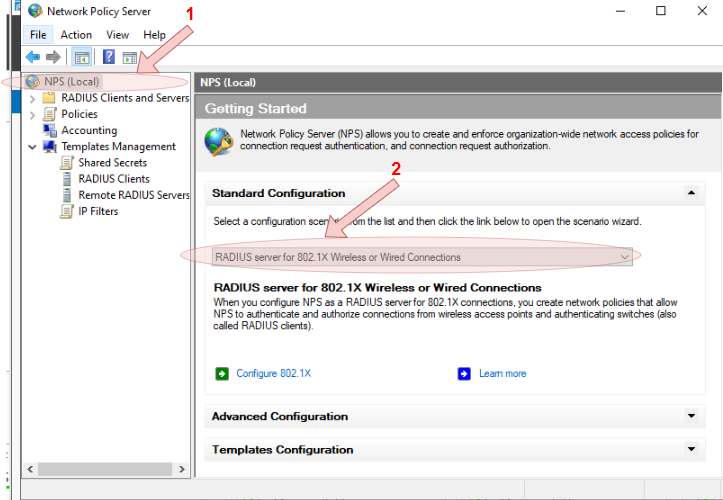
- Launch the Network Policy Server console
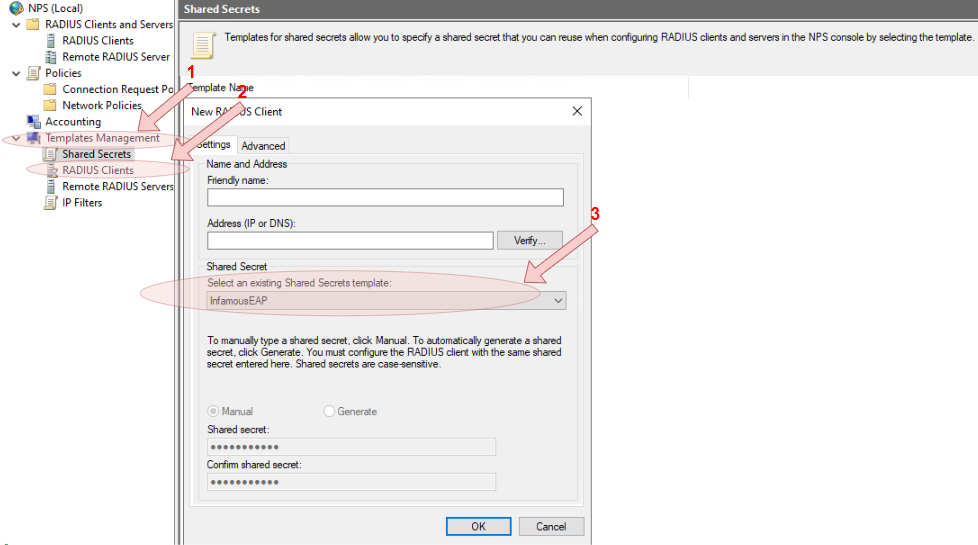
- Expand the
NPS (Local)tree, and click on theShared Secretsnode, then right click on the node and selectNewfrom the context menu, then configure the shared secrets template.
Ensure that the secret configured at this stage is secretly stored, as it will be needed again in the Defining a RADIUS profile step to pair the UniFi with the NPS server.

- Expand the
NPS (Local)tree, and click on theRADIUS Clientsnode, then right click on the node and selectNewfrom the context menu, then configure the client template. Ensure that the newly createdShared Secretstemplate is used by the client template as well.
RADIUS clients are the AP themselves, therefore the IP address of the AP must be known prior to configuring the template.
- Right-click on the
NPS (Local)root node, change the standard configuration scenario toRADIUS server 802.1X Wireless or Wired Connections
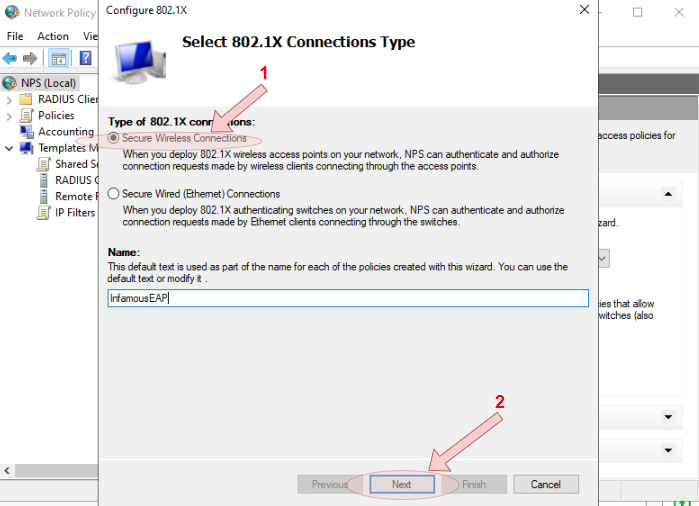
- Ensure the
Secure Wireless Connectionsradio button is select, and name the configuration request profile, then clickNextbutton
- Ensure that the created RADIUS Client template has been added, then click
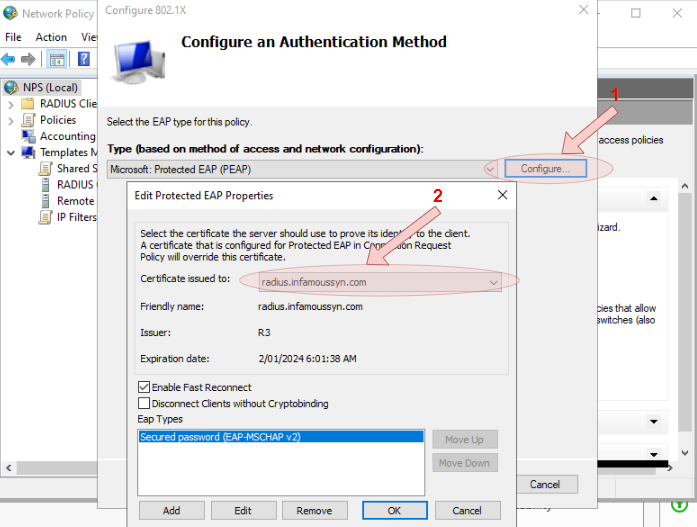
Nextbutton - Change the type of the
Microsoft: Protected EAP (PEAP, and then press theConfigure...button. Ensure that the appropriately installed certificate is selected, after which click theOKbutton, and then theNextbutton
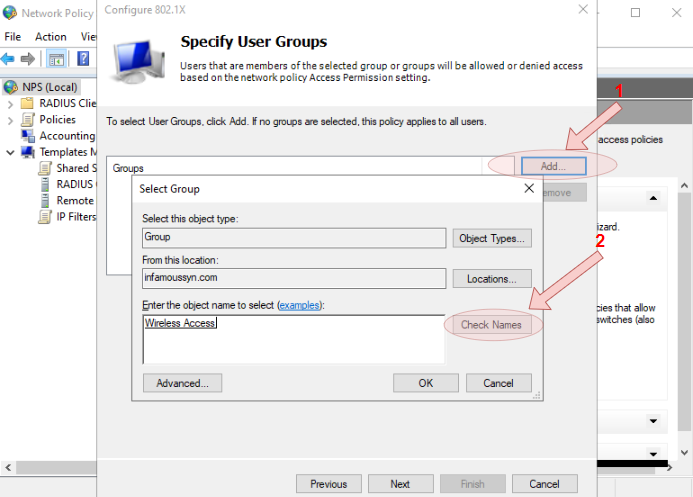
- Once at the
Security User Groupsscreen, create a new security group in the Active Directory Domain Services (AD DS)
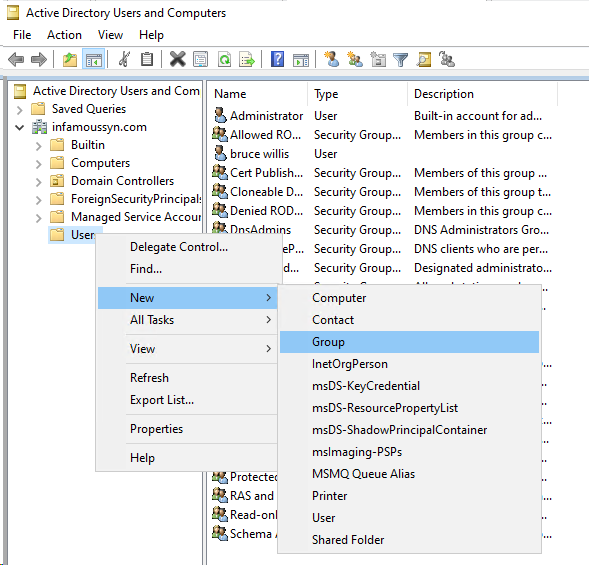
- Add the newly created security group to the Groups list, then complete the wizard
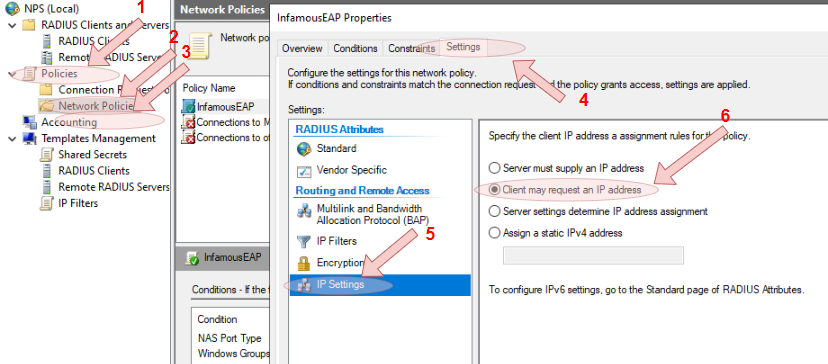
- Expand the
NPS (Local)tree, and click on theNetwork Policiesnode, right-click the newly created connection profile, then in the properties window, click theSettingstab, then navigate to theIP Settingsmenu and click theClient may request an IP addressradio button is ticked.
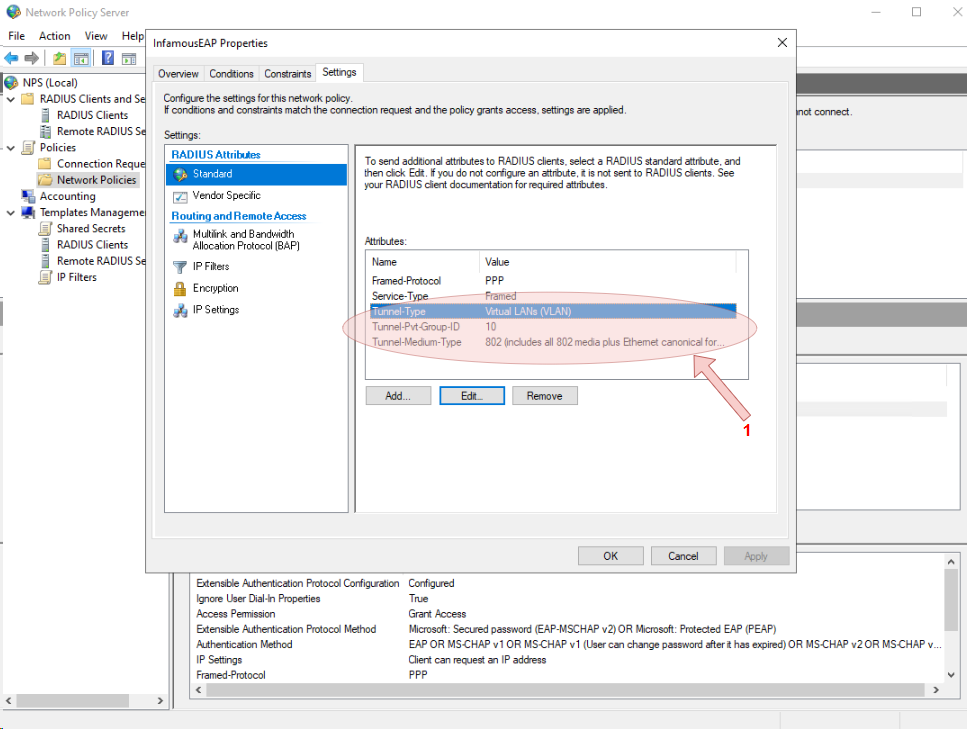
Configure VLAN Tagging (Optional)
If the WLAN design requires users to be placed into a different VLAN to that of the RADIUS server, RADIUS attributes can be configured to handle the require tagging.
- Click on
Standardunder theRADIUS Attributesgroup in theSettingstab, then add the following attributes:
Tunnel-Type: Click theCommonnly used for 802.1xradio button, then selectVirtual LANs (VLAN)from the drop down listTunnel-Medium-Type: Click the802 (Includes all 802 media plus Ethernet canonical format)radio buttonTunnel-Pvt-Group-ID: Click theStringradio button and then specify the VLAN value
Configuring the UniFi Network Server
For the purposes of speed and ease, templates will be configured in the UniFi web console before configuring the WLAN profile.
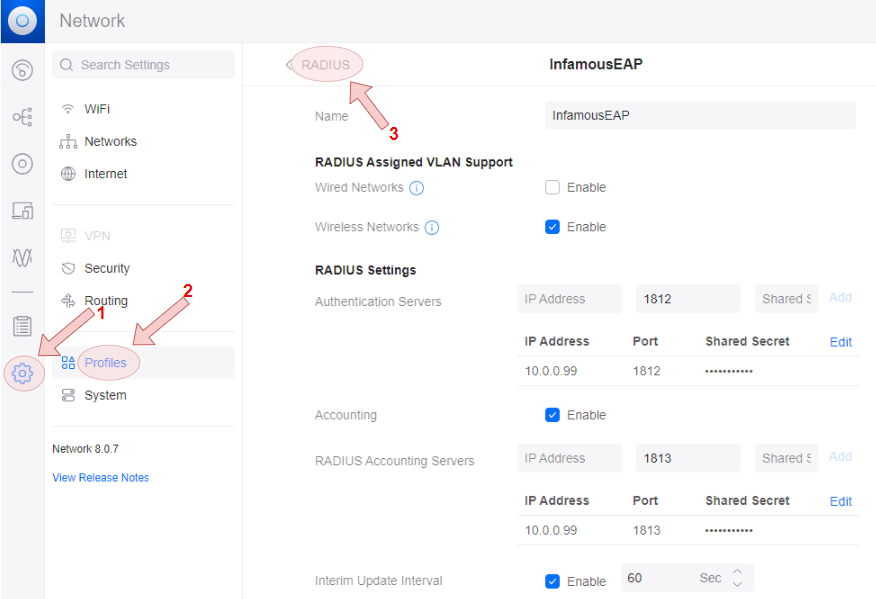
Define a RADIUS profile template
- Navigate through the Settings menu to the Profiles menu, and then select the
RADIUStab, finally create a template
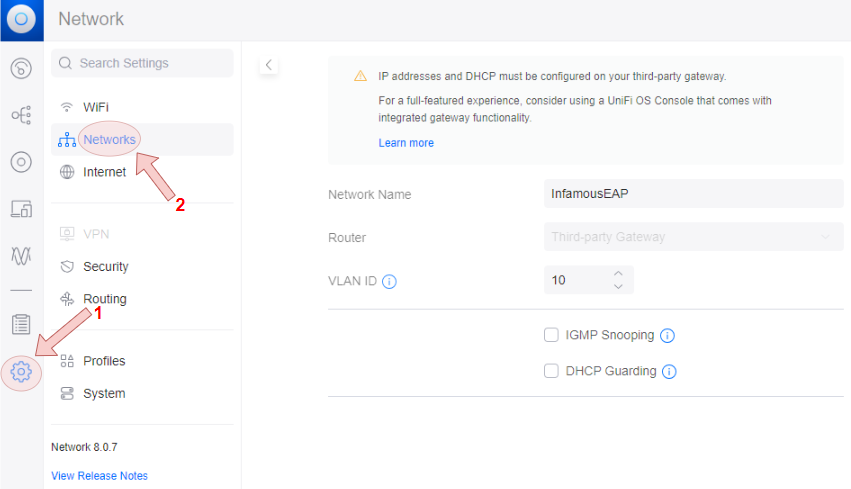
Create a network profile template
- Navigate through the Settings menu to the Networks menu, then create a network profile template. Ensure that the VLAN ID corrosponds to the value set during the Configure Network Infrastructure section.
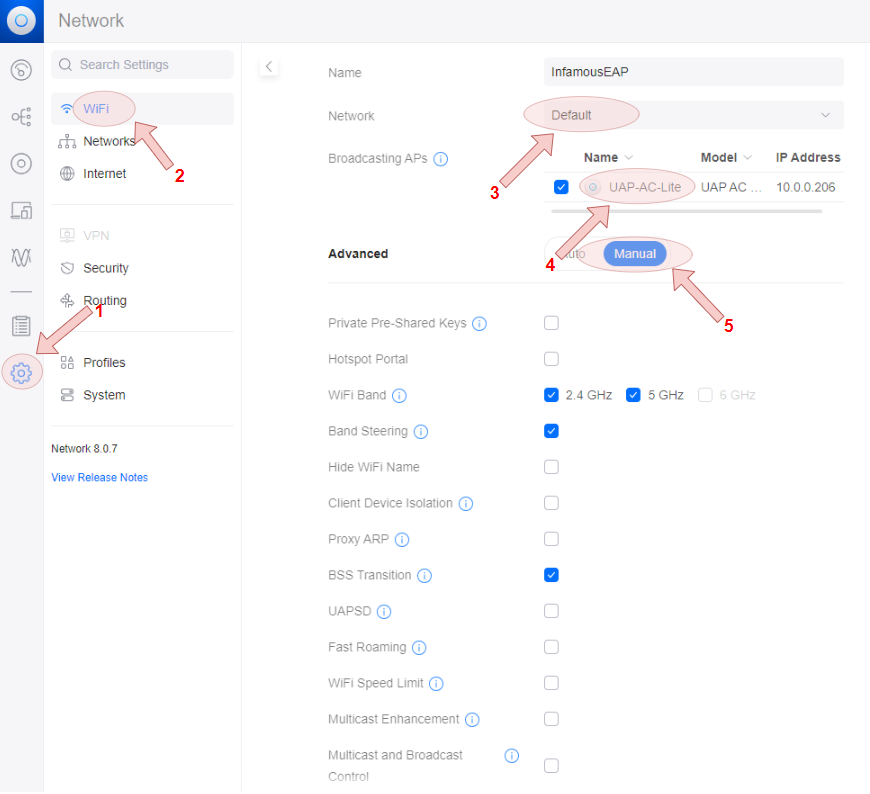
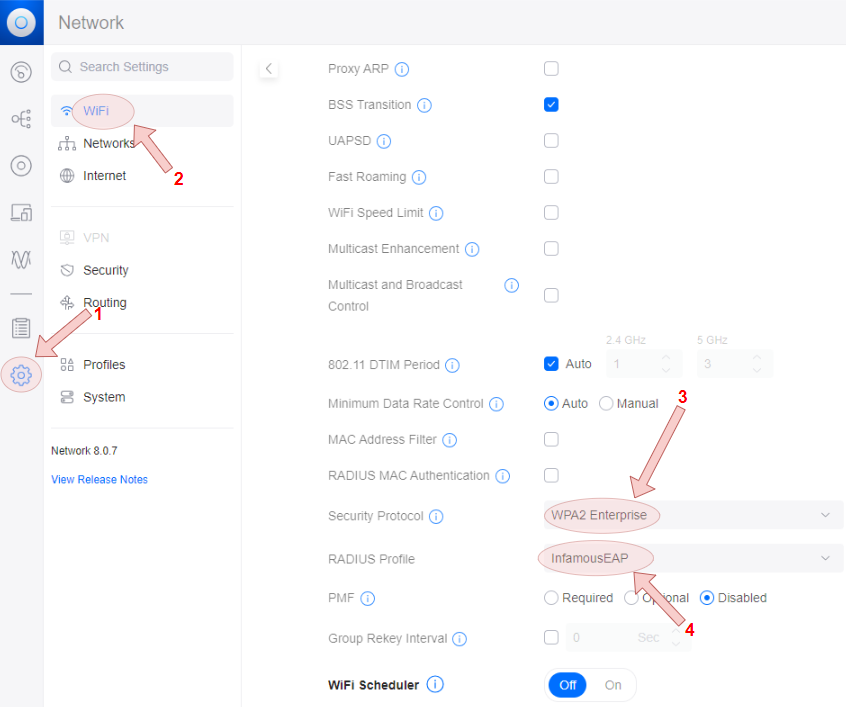
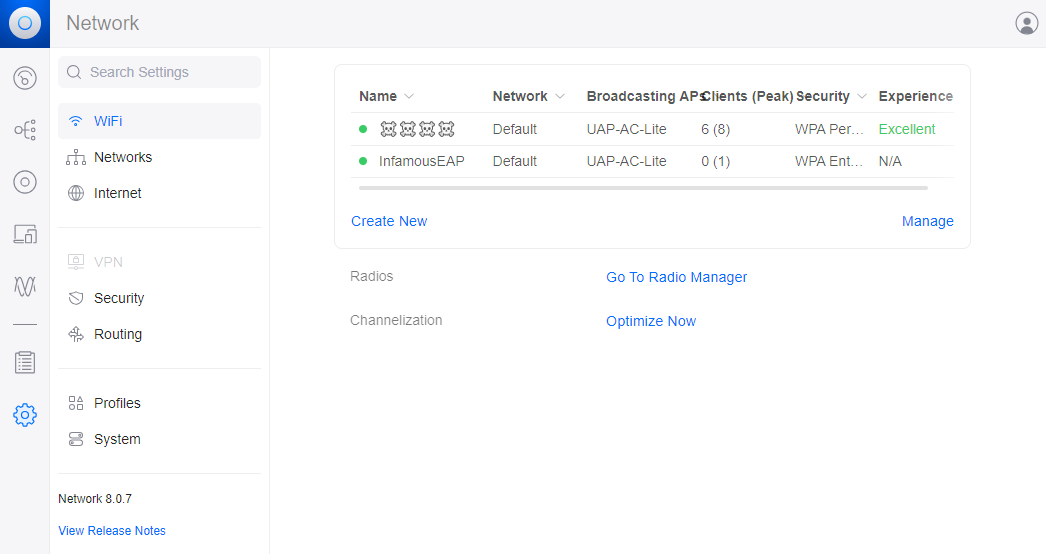
Create the WLAN profile
- Configure the WLAN profile, referencing the relevant templates